Friday, February 4, 2011

Judgement Day


I have been wanting to enter some of my beers in a competition for quite some time now to see how Moonstone brews stacked up against other home brewers, but was never confident enough that my own recipes were good enough. I also have been waiting for a Canadian competition. I feel now that my recipes, and resulting delicious beverages, are really starting to improve and are ready to be judged next to other homebrewers that have been doing this much longer than me. 

There is a homebrew club in Calgary called the Cowtown Yeast Wranglers and they are holding their third annual Cowtown Homebrew Roundup at the end of this month. I currently have only two beers ready to be entered on such short notice.


This competition will be held at the Wild Rose brewery and the entries will be judged by BJCP certified judges. My House Ale has been entered in category 10A (American Pale Ale) and my second entry was a toss-up between my Pumpkin Ale and my latest Chocolate Stout which both fall under category 21A (Spice, Herb, Vegetable Beer) I poured my first Chocolate Stout from this batch about 10 minutes ago and have decided it's going to Calgary!.... This means I have a few bottles of Pumpkin Ale stashed away that will be not... come on up to the brewery and help me drink them and you can judge for yourself.... you can even give me a prize if you want.

I figure i've got nothing to lose and I realize I probably wont score that well with over 250 entries from coast to coast last year, and more expected this year..... but it will be interesting how well I score in my rookie year and will definitely help me decide where to change and make adjustments on two of my brews that i'm really starting to dial-in and perfect. I wish I had some Amber ready for this competition but I know this wont be my last competition.

I have not been updating this blog much lately because there has not been much new to report. I am constantly brewing, but am now just tweaking recipes and making changes where needed... I have also decided not to share my recipes online as they become my own. Any major updates such as new beers, (seasonals, one-offs) new equipment, competition entries and results, etc. will all be posted here .. hopefully. However, if you which to keep in touch and follow closer, make sure you join the Moonstone Brewery Facebook group. I know there are a few people that check this blog that are not on my Facebook. Here is a direct link to the group: http://www.facebook.com/group.php?gid=114793385227251

Thanks for reading.

Saturday, October 30, 2010

Movember is Almost Here

Movember is almost here, and the brewmaster of Moonstone Brewery will be growing a mustache for the entire month of November to help change the face of Men's Health. Please donate to my team, The Lanny McDonalds, and the beers are on me at the Brewery. (My House)


I've donated my face to Movember! Now I'm asking you to make a small donation to support my moustache and the 1 in 6 men that are diagnosed with prostate cancer. Thank you. http://ca.movember.com/mospace/537348/

Tuesday, October 5, 2010

Long Overdue Updates

It has been a long time since I have posted, I have been very busy and I have also stopped posting recipes, because I am now creating my own. It is difficult to squeeze in a brew day as I need a good four hours for an all grain brew. I also have moved the brewery to the garage......

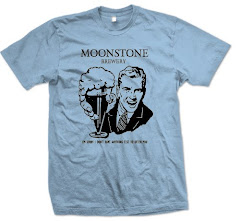
Potential new T-Shirt?

Here is a brew-by brew update of where I am right now.

Moonstone Pale Ale -
Brewed: July 21st, 2010
Racked to Secondary: August 1st, 2010
Bottled: August 19th, 2010
OG: 1047 FG: 1010 ABV: 5%
This beer was my first all grain brew and I tried to keep it simple .... The brew day post can be found here. I was using a new brew pot and later discovered that I was not lighting the burner properly, therefore could not keep a steady boil. When I transfered this beer to the secondary, I noticed it was very cloudy.... at this point I was worried, without a full proper boil, I had run the risk of contamination and improper bitterness extracted from the hops. This was not my main concern as the cloudiness was really bothering me... I tried to clear the beer by crash cooling it, I placed the entire carboy in my garage fridge.
Crash cooling meant I had to sacrifice fridge space of drinkable brew. Thankfully I have four fridges.

The Crash Cooling seemed to have no effect, so I bottled it anyway. After three weeks of carbing and conditioning, the beer poured cloudy, had an aroma of vegetables, and tasted like shit. I tried cold conditioning some bottles for several weeks with no improvement...... until today. I poured a glass of warm Pale Ale to snap a picture of its cloudiness for this blog, to my surprise, after 6 weeks in the bottle, it had cleared. I took a sniff and was surprised that it smelled like beer instead of vegetables. I have placed four bottles in the fridge for a taste test, I will update with my results.
After six weeks of bottle conditioning, it actually looks drinkable.....

Moonstone Heffeweizen-
Brewed: August 12th, 2010
Racked to Secondary: August 19th, 2010
Bottled: September 1st, 2010
OG: 1070 FG: 1012 ABV: Unknown (read below for explanation)
This was my second attempt at an all grain brew and this Heffe was brewed according to the Bavarian Law of Purity containing just four ingredients, malted barley, water, hops, and yeast. To keep it real, I even used nothing but 100% German ingredients (except for Moonstone water) and this beer was also my first time using a liquid yeast. Many beers can be brewed with common neutral yeasts, however some styles receive a lot of characteristics acquired from the yeast strain. For this Heffe I used  a yeast from the Weihenstephan strain, which is the most common yeast strain used by German brewers ... this yeast can exhibit a clover and banana smell which came through very strong on this beer. This is also a wheat beer, therefore using a wheat yeast with wheat malts will retain some of the yeast in suspension for a cloudy appearance.
Liquid Yeast

After the brew when the wort was poured into the primary fermenter I noticed the level was very low, I took a gravity reading and was shocked to see I overshot it by a lot .... The OG reading was 1070, obviously my water to grain ratio was way off. Also, adding to the problem was the fact that I mashed for 90 minutes rather than the previous brew mash of 60 minutes. Perhaps I shouldn't be experimenting so much on just my second all-grain brew. When the beer was racked to the secondary the hydrometer showed the final gravity to be 1012, this would translate into an ABV of 7.8% which is way too high for this beer style. I boiled some water to sterilize it and topped off the carboy. The evidence of this watering down shows through on the final beer.
Moonstone Heffeweizen after a few weeks in the bottle

Moonstone Heffeweizen today


It is very hard to screw up a beer, and although this beer is still very nice, my mistakes are definitely noticeable. Because it was watered down, the mouth feel and body is much lighter when consumed beside a real German Heffe, I have since dialed in my water to grain ratio and will correct this next time. The banana smell from the yeast is very strong which means I need to ferment at a slightly higher temperature next time, and even though it was watered down , this beer still has a strong alcohol taste and is much stronger than it should be.

Moonstone Amber Ale-
Brewed: August 20th, 2010
Racked to Secondary: August 30th, 2010
Bottled: Sep 13th, 2010
OG: 1052 FG: 1010 ABV: 5.7%
My Rusty Cap Red was an extract brewed amber ale and was a huge success. I decided to convert this to an all grain recipe and I wanted it to be all mine. I used a base recipe for the extract version and accidentally created my own hop schedule due to the fact that I didn't have the proper quantities on hand when the wort was boiling. Since I now had my own hop schedule, I just needed the grain bill ... I decided to read about Amber Ale and it's style guidelines and came up with my own recipe. I brewed it up and even tossed in a touch more centennial hops at the end of the boil for some added aroma. This beer has aged for three weeks and I sampled a few last week at around the 2.5 week mark .... the carbonation isn't yet where I would like it and there is a very nice strong hop taste and aroma that I expect to mellow out in another week or so. I am going to take a break from writing this to go pour one now and snap a picture. ...........
Moonstone Amber Ale ... why do we have so many apples?

Ahhhhhhh ..... wow, its good. It still will benefit from some further bottle conditioning and some cold conditioning. I like it where it is now, but it will appeal more to others once the hoppy-ness mellows slightly.


I have two more brews on the go right now, they are two specialty beers that I have done for the fall and winter season. The first one, which I hope will be ready for Halloween, is a Pumpkin Ale brewed on September 16th with pumpkin, nutmeg, and cinnamon. It was bottled this evening and it already smells and tastes amazing....... pumpkin pie in a glass is the best way to describe it. Despite all the added stuff that went in the brew pot, this one was very clear when bottled. This one comes in at an ABV of 5.6% - I will scale back my grain bills slightly in the future to try and get closer to 5%.
Pumpkin Ale bottled

Moonstone Pumpkin Ale showing a very nice clear orange color.

A certain friend of mine loves Scotch Ale, and even though I am not a huge fan, I have brewed one up that I hope will be ready for Christmas. Moonstone Wee Heavy was brewed on September 27th and is still chugging away in the primary, this is the slowest fermentation I have ever experienced. The original gravity was 1074 and I took a reading today and it is only sitting at 1030, it still has a way to go. My target ABV is around 8% which would make it correct for the style as Wee Heavy's are typically higher than 7% ABV. This beer will need to spend around one month in the secondary fermenter to age properly and another 2 months in the bottle which will make this strong beer ready for Christmas.
Moonstone Wee Heavy in the primary fermenter.

Well, that is where the brewery sits today, up next will be a second attempt at the Pale Ale with a proper boil, and I need to come up with an all grain recipe for my Chocolate Stout. i would like to get these two brewed before the deadly Moonstone winter hits and my passion for brewing is crushed by 10 feet of snow and -50 wind chills...... As for brewery upgrades, I would love to move my operation 100% to the garage, which means adding a sink and plumbing as well as a temperature controlled fermenting closet. I also would like to start kegging but cannot afford the investment at this point ..... the ONLY thing I do not enjoy about brewing is the bottling. Keep posted for the birth of Moonstone Farms this spring as I will be attempting to grow my own hops in the back yard.

Thursday, July 22, 2010

July 21st, 2010 - My First All Grain Brew Day - Pale Ale

I had constructed all of the equipment and found a simple Pale Ale recipe so I was ready to start. I started looking at the numbers and I wasn't convinced that there was enough. My primary fermenter is 30L and my secondary is 23L. All of the AG recipes online are for a 5.5 gallon batch, but 30L is 6.5gallons .... I usually fill the primary as high as I can and of course, a lot is left behind (trub and some wort) when I rack to the secondary. I wanted to make sure I didn't come up short so I modified the recipe. I started a spreadsheet and converted all the ingredients from a 5.5gallon batch to a 6.5gallon batch. I also substituted where I had to, and converted imperial units to metric. Here is the original recipe with my changes marked:

Source - Haus Pale Ale

RECIPE

5.5 gallon batch (conversion to 6.5gallon and other changes in red)
Grain Bill:
8 lbs - 2-Row Pale Malt (4.3kg 2-Row Pale Malt)
2 lbs - Vienna Malt (1.1kg Munich Malt)
0.5lbs - Crystal 10L Malt (0.27kg Carastan15L)

Hop Schedule:
1.0 oz Cascade (60min) 34g
0.5 oz Cascade (30min) 17g
0.25 oz ascade (15min) 9g
0.25 oz Cascade (5min) 9g


1 Whirlfloc Tablet (15min)

Nottingham Yeast

Ferment in Primary for 10 days @ 68F (7 days Primary, 7 days Secondary)


5.67kg of grains (12.5 pounds)

Hops, Yeast, and Whirfloc

The grains needed to be mashed at 152F for 60 minutes, and I had to account for heat loss. I anticipated 10-12 degrees loss to the cooler walls and another 11 degrees to the grains, therefore, my strike water had to be heated to 175F. Using 1.35quarts of water per pound of grain, I used 15.5L of mash water. The water was heated to 175F and poured into the cooler. I closed the lid and the temperature rapidly dropped. In order to make sure I hit my mash temperature of 152F, I would have to Dough-In at 163F (anticipating 11degree loss to grains. The grains were added and I mixed well until the temp hit 152F - I closed the lid and covered the cooler with an electric blanket and covered that with a fleece blanket just to be sure.

Heating 15.5L of strike water to 175F

Dough-In at 163F - I can't believe how amazing this smelled

Lid closed and covered up with electric blanket and Maple Leafs fleece. (I'm praying for playoffs this year)

Electric Blanket set to high

After 60 minutes, I opened the lid of the MLT and was very pleased to see that I was able to hold steady at 152F for the full hour. The mash was left for another 8 minutes while the mashout water was continuing to be heated. I calculated Sparge water at 1.33quarts per pound which worked out to 14.5L, this left me with 5.5L of water for the mash out. The total water used was 35.5L, this accounted for a volume of 6-7L to be lost to the grain and to the boil off. My calculations were correct because in the end I nailed the volume for the fermenter dead on! The 5.5L were added to the mash at 175F and stirred in, I let this sit for 5 minutes before vorlauf and collecting the first runnings. My understanding of the mash-out is to mainly bring up the temperature of the wort to allow it to flow easier out of the Mash / Lauter tun. Vorlauf is the process of clarifying the wort, I simply pour into a pitcher when the valve is first opened until the wort begins to run clear. This pitcher is then poured back into the MLT while the first runnings are being collected.

The mash held at 152F for the full hour

Vorlauf - drain the wort into a pitcher until it begins running clear

Vorlauf - returning the collected cloudy wort to the MLT (we wouldn't want to waste any sweet delicious wort)

Collecting the first runnings

When the MLT was finished draining, the valve was closed and the 14.5L of 175F Sparge water was poured in, mixed well, and the lid was closed for 10 minutes. I then began vorlauf and collected the second runnings. The wort was boiled for 60 minutes and the hops were added per the schedule. With 15 minutes left in the boil, the wort chiller was dropped right into the boiling wort (this will sterilize the chiller) When the boil was complete, cold water was run through the chiller and the wort cooled from boiling to 80F in less than 10 minutes. I transfered it to the primary, pitched the yeast, and added a blow off tube. I took a gravity reading and came in at 1047, which is only 4 points below my target. I'm pretty happy about being that close on my first all grain brew!

Compacted grain bed after first runnings were collected.

Close up of the grain bed - mmmmmm.

Wort chiller dropped into the brewpot with 15 minutes left

Primary fermenter with a blow off rigged up.

Gravity reading of 1047!

Over all my first all grain brew day was a success even though I did have trouble with my propane burner. I had trouble heating the water as well as maintaining the boil. I fear the boil inconsistency will affect the hop utilization negatively. I started my brew day at around 7PM, and at about 1AM and many beers later, it was complete. i will have to investigate what the issue is with the propane burner before my next brew day, which hopefully wont take nearly as long.

Here's My Home-Ade wort Chiller

Well- I just finished my first All Grain Brew and it's 1AM and I can't find the camera? (I hope I didn't boil it??) So for now, here is some pictures of my home-ade wort chiller which worked very well tonight. Brew day post coming soon.

The wort chiller in the brew pot.

The wort chiller out of the brew pot - cold water gets pumped in and the discharge is quite hot - this cooled the wort from 210F to 80F in 10 minutes!

Sunday, July 18, 2010

Construction of a Mash and Lauter Tun

I have only been brewing beer for a few months, but i'm ready to jump into All-Grain brewing. I was afraid to make the jump mainly because I thought it would be a large investment. I did some research and realized there was nothing to be afraid of, I already had the perfect cooler to convert to the Mash and Lauter Tun, so I only needed around 30 dollars worth of material to make the conversion. I would also need to find a larger brewpot and a burner that could bring 6+ gallons to a boil easily... luckily Walmart had a good deal on a Outdoor Lobster Boil kit.

Coleman Extreme cooler which I received as a gift years ago. I never really used it because its odd shape inside made it difficult to fill properly with beer.

Outdoor Lobster boil kit which will be my new brewpot.

Why do I need a Mash / Lauter Tun? - Up until this point I have been brewing partial mashes which rely on a malt extract, which is a product produced strictly for home brewers. Basically someone has already mashed the grains for you and sells it in a concentrated syrup. Partial Mash brews rely on the extract for over 90% of the fermentable sugars and then during my brew a small amount of grains are steeped to add color and mouth feel. The Mash and Lauter Tun will allow me to brew an All-Grain Beer without using any extracts. This will produce a much higher quality beer and will allow me more freedom with the recipes. It will also eliminate any "homebrew twang" off taste that may have been present as a result of the manufactured extract syrups. To be able to Mash I need a vessel which is large enough to hold over 10lbs of grain with water at a steady temperature for about an hour..... a cooler is perfect for the home brewer. Mashing allows the enzymes in the Malt to break down the starch in the grain to sugar. Lautering is the process of separating the liquid wort from the grains. I have built a manifold in the bottom of the cooler that will allow me to do just that ..... hence the Mash and Lauter Tun will be a single vessel.

Why do I need a larger Brewpot? - Previously I was boiling half the batch and topping up the fermenter with cold water to get the full batch size. I was able to do this because I was using a concentrated extract. When Mashing, I will have to be sure to use the proper amount of water and will be boiling a full 5 gallon batch. 

Before I get too far, most of the info for this conversion came from Home Brew Talk Forums and specifically http://www.homebrewtalk.com/wiki/index.php/Converting_a_cooler_to_a_mash_tun

The first step was to remove the spigot from the cooler and construct a water tight passage that would have a ball valve on the outside to control flow speed and a coupler on the inside that would be able to receive the manifold. I used a 1" diameter, 2" long brass pipe nipple, on the inside I reused the rubber gasket from the original spigot and threaded on a 1" coupler. On the outside I threaded on the ball valve and used washers to space it and keep it snug.
1" coupler threaded to the pipe nipple - here you can see the re-used rubber gasket from the original spigot

ball valve on the exterior spaced with 4 washers.

Next I built the manifold. I cut the copper pipe to the lengths I required and simply pieced it together using tees and 90 degree bends. Everything fits snug together so no welding was required which will make this easy to disassemble for cleaning and maintenance. I used two 45's to line up with the exit to the valve as instructed in the homebrew wiki link above, however the manifold would not sit flat on the bottom. I simply offset it slightly to allow the manifold to sit flat on the bottom. A series of slits were cut into the bottom of the manifold which when completed will allow the wort to drain from the cooler and leave the grains behind. There was really no science to the pattern of the manifold or the spacing of the slits, I just hope it does what I need it to do.
The copper manifold constructed and in place

The bottom of the manifold reveals the slits

closer view

I then heated up some water to 160F using the new brew pot to test the MLT for leaks and everything was perfect, not a drop.


I now am excited to choose a simple recipe for my first All-Grain brew day, and find some time to do it. When I was brewing extracts and only doing half boils, I was able to cool the hot wort by topping it up with cold water. now that I will be doing a full boil, I will need a method to cool the wort quickly to an appropriate temperature for pitching the yeast. Until I have the time to build a wort chiller, I will have to use a large bucket of ice water.

Thanks for reading - All Grain Brew Day post hopefully coming soon.

Monday, July 12, 2010

Brew Day July 5th, 2010 - Light Ale

Before I start this post I have to give a huge thank you to Dan and Leanne for the amazing hand made Moonstone Brewery sign. This will be mounted over my garage door when I move my operations out there. Eventually, I hope it will be hung proudly somewhere in our real brewery. Honestly  .... this was a huge surprise. Thank You!

Receiving the sign in Pymatuning State Park PA

Displayed proudly in front of my beer fridge.

It's summertime, so I am trying something light, this beer is half rice and and half malt for a lighter body. Also, the amount of sugars is reduced because I will be using an additive that will ferment 100% of the sugars producing a very light, dry, crisp beer. This Beer is also a full extract beer, meaning I did not steep any grains, this is the first time I did not use grains which is interesting on the timing because I am taking advantage of my holidays this week to make the jump to all-grain brewing. Stay tuned for updates of my Mash / Lauter tun construction.... eventually the Brewery will be completely moved completely to the garage.

Here is the recipe, the Amalyse enzyme is the additive that will ferment this beer right down to a 1.000 gravity.

1.5 Litres Pale Extract = 3.3lbs
1 lb of dry Rice Syrup = 1.2 lbs

Hops
-----------------------------------------------------------------------------
1.00 oz. Hallertauer - 45min
0.25 oz. Hallertauer -
5min
0.25 oz. Hallertauer – 0min


Extras
--------------------------------------------------------------------------
1.00 Tsp Amylase Enzyme Other 14 Days(fermenter) 


Yeast
-----
Nottingham

Notes
-----
Add Amalyse when racking to secondary

Ingredients

Boiled 1pound of dry rice extract (the pale malt extract was added at 20 min remaining in the boil)

Light Ale in the fermenter

Blow-off tube to deal with Nottingham Yeast vigorous fermentation (which did not happen)

Original Gravity of 1034 - I was shooting for 1030.

Post here and let me know if I should add lime to this beer or not? .......